Intaglio how to and materials list
Intaglios were a gateway GM craft for me. With a little clay and some molds you can have quick and satisfying projects that make you feel real fancy and can be displayed in so many different and fun ways. I added a whole gallery to the blog of intaglio ideas because there are faaaaarrr too many to put on the how to post. Also, the directions are first and the material list is at the end because I hate scrolling through endless lists to get to the how to or recipe or whatever.
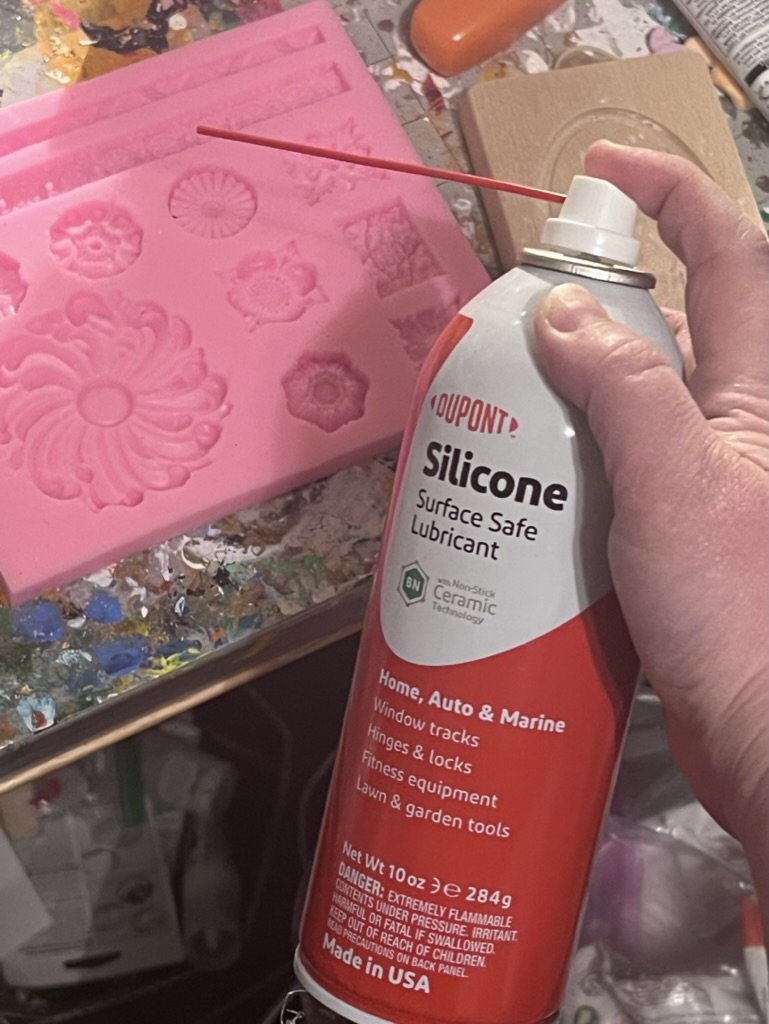
A friend suggested spray silicone for intricate molds and I find that it works great on flat rubber molds but doesn’t help much for wood ones or for three dimensional molds. I give the mold a good spray before I get the clay out so it’s nice and ready.
I’ve been using air dry clay (links at the bottom) but I know folks who use clay that can be baked, Plaster of Paris, and even hot glue. I don’t find the hot glue to be firm enough for how I like mine and I prefer the air dry clay. The plaster of Paris can come out a bit smoother but you’ll have to be very careful getting it out of the molds.
Air dry clay should be nice and moist when you first open it but you still want to knead it in your hands until it gets really nice and smooth. The clay in this picture was previously opened and stored in a ziploc bag and got a bit dry so I kneaded a few drops of water into it until it was the consistency I wanted.

Pull the amount you think you’ll need for the mold off the clay ball and press it firmly into the mold. You’re going for as flush as possible. Some people like a lot of extra clay behind the impression but I prefer mine to look clean so I pull any extra clay out from around the mold while it’s wet. If you like the look of the mold in relief you can keep a large amount of clay on the back and form it into the shape you like.

The air dry clay tends to look a little gray when it’s wet and gets brighter white as it dries.

This one dried overnight and then was peeled gently out of the mold.

The wet spots on the back of these mean they need to continue to dry outside the mold before they’re used.

An air dry clay intaglio is great because when it dries you can break off pieces of clay to make the casting crisper. I’ve used toothpicks, metal scratchers, and my fingernails to break off small pieces. You can also very lightly sand the back and any edges you want smooth with fine grade sand paper. you can scrape one made of Plaster of Paris but I find them to be a bit more fragile. And that is really and truly it. From there you can embellish the casting, frame it, display it…whatever you like. E6000 glue is going to typically work well to stick these to whatever you’re displaying them on or in, and you can go wild with frames, mats, acrylic blocks…seriously, check out the intaglio gallery for ideas it’s crazy.

Many people leave their intaglios white and frame or display them plain.

You can also put gold or silver (or really any color you’d like) on them. I like either liquid leaf or gold paint pen for this. You can paint the entire piece…

Or very lightly dry brush it to accent the depressions that won’t get painted…

Or do the edges for a more traditional GM look.

Many intaglios have a bright gold edge, and some have gold accents or are entirely gold. Liquid leaf is the easiest and quickest way to get a rich gold. If you want a very bright gold you can’t beat the color of the pilot paint pens, as annoying as they can be.

https://www.etsy.com/listing/1115044902/bows-silicone-mold-2-cavities-2?ref=yr_purchases&fbclid=IwAR1a3jlxqdMoB7wP-HSHqchIFQzvakzs1-Ib2yyqvUzRKizsfKKgBBceyLc

https://www.etsy.com/listing/1111878532/bows-silicone-mold-4-cavities-4?ref=yr_purchases&fbclid=IwAR2xzSqumBHmP9m7d1F8ab2bcSExBOxP6AdiFPWVzYb0gx8zkivnn2l8mys

https://www.etsy.com/listing/1171371149/fully-custom-single-matboard?gpla=1&gao=1&variation0=2468164127