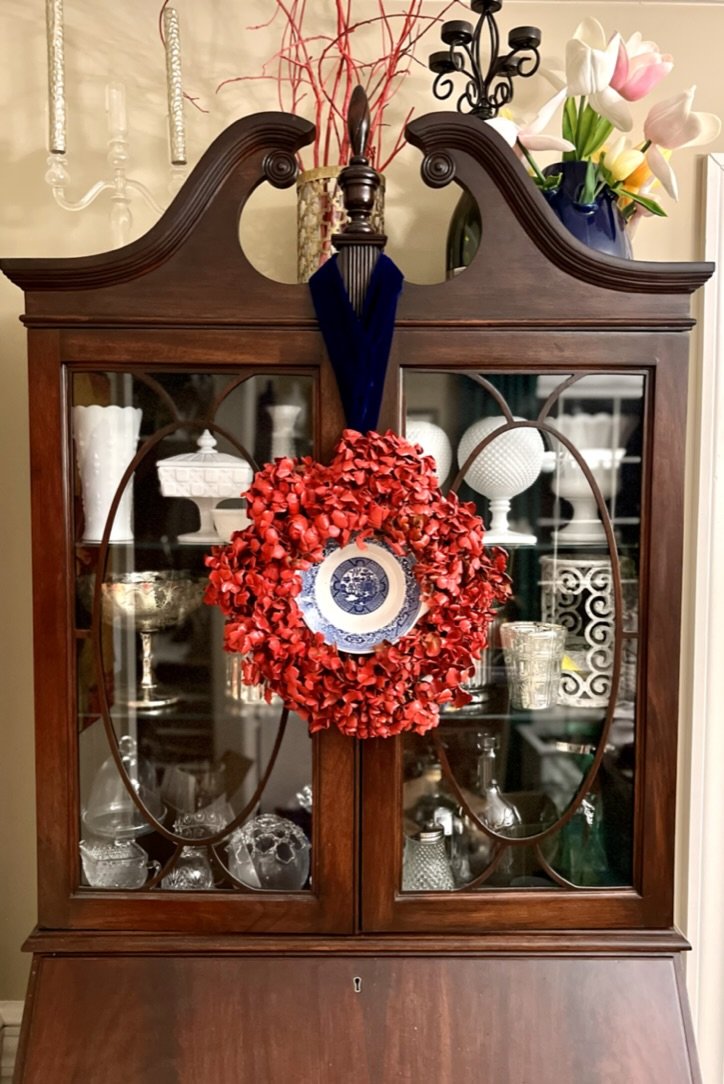
dried and spraypainted hydrangea wreath
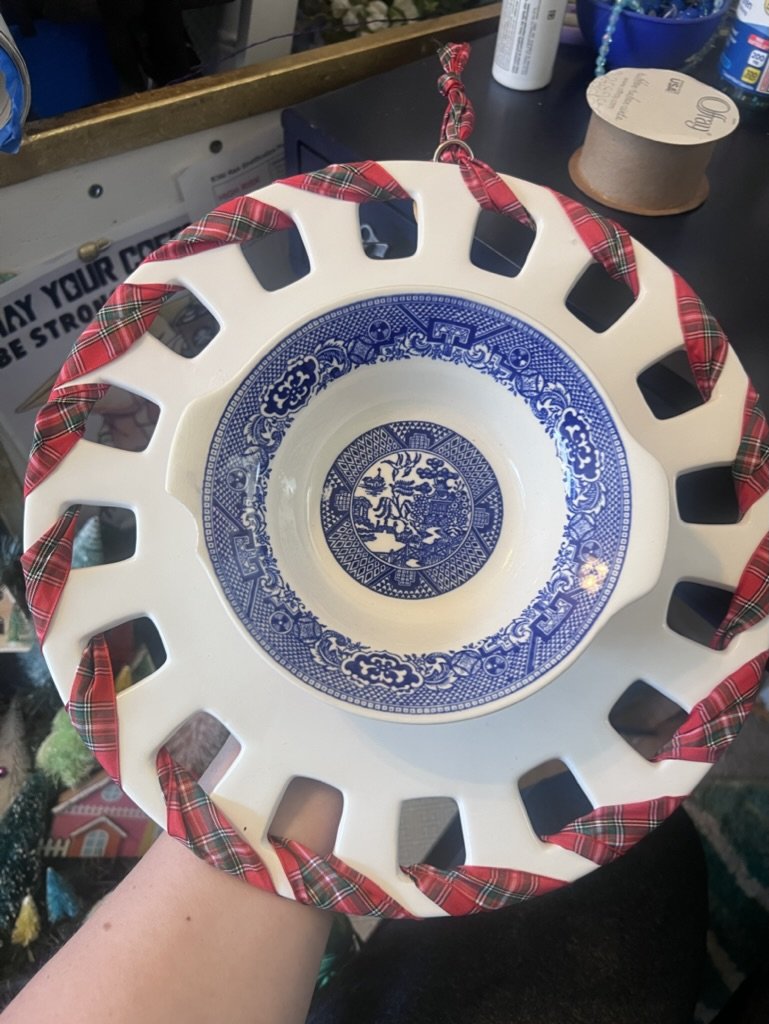
In a real Alice in Wonderland move I’ve been dying to paint my hydrangeas red since this summer. It always breaks my heart when they stop blooming and start to dry, and I have loads of dried hydrangeas stashed in arrangements around my house. But I saw a trick on Pinterest where people were spraying them blue or pink or whatever color they wanted for an event and I got a deep, deep urge to break out the Rustoleum poppy red. Earlier this fall I found one of those plates you can thread ribbon through and a Blue Willow bowl and thought myself quite clever to Tite Bond them together. And then it languished in the croffice (that’s my craft room/office) for three months as I decided the ornaments I had planned for it didn’t work and I couldn’t get the bowl off. No configuration of ribbon looked cute. First world problems.
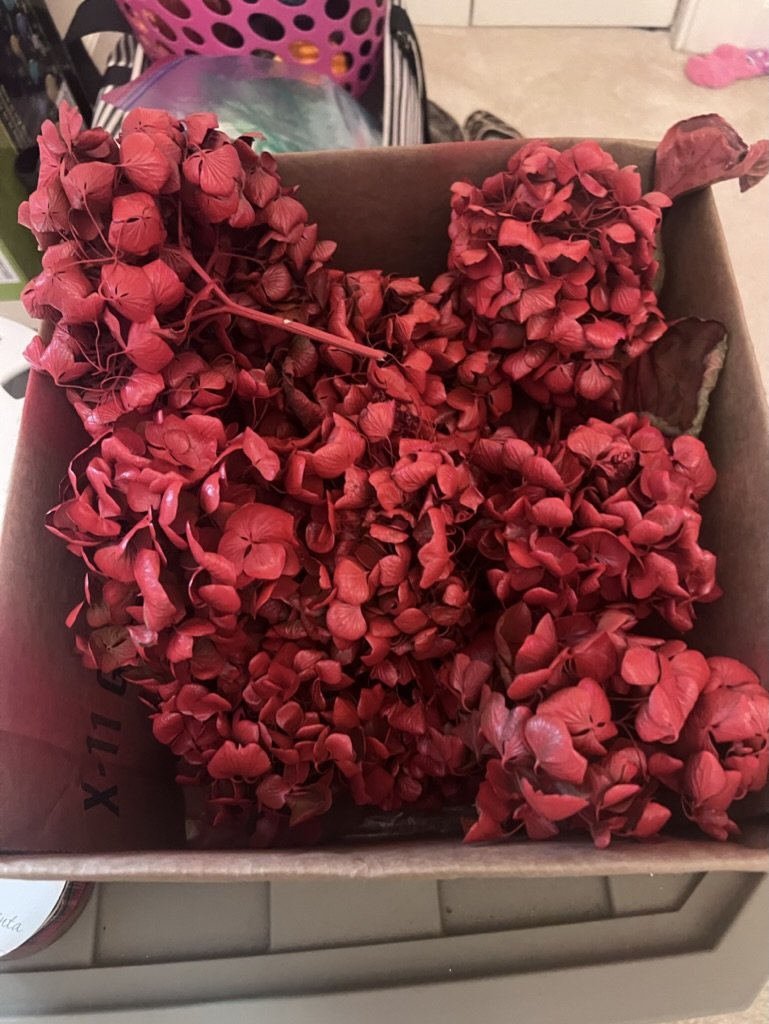
But then…a magical day! A dry, warm sunny day after a couple of weeks of cold where the hydrangeas were totally dry on their bush and it was supposed to rain the next day so I could not procrastinate. And so, like any perfectly normal person, I decided to spray paint my hydrangeas. I like to do a little mental planning occasionally and i was pondering how i could put the stems in styrofoam to spray them, or paint half and let dry and turn them and then…..eureka! It occured to me I could paint those suckers ON THE BUSH and also somehow cover them so as not to paint, say, my sidewalk or front steps or driveway. One can of Rustoleum Poppy Red (https://www.walmart.com/ip/Poppy-Red-Rust-Oleum-American-Accents-2X-Ultra-Cover-Satin-Spray-Paint-12-oz/176406988) and an amazon envelope later and I was golden. Or, actually, this time, red.


The poor flamingo has lived through more shenanigans than my kids so he just gave up and played dead so as not to get sprayed as well. I left them on the bush all day to dry. Next time I’ll probably do a second coat 15-30 minutes later being sure to spray the layers of flowers, I had to do more touch ups than I would have preferred later on. They were dry enough both paint and dried out flower wise to break them off the bush that night, and I gave them a quick touch up in their box before letting them dry overnight. (Turns out you want to spray them from all of their 17 different sides if your goal is all red and not patchy/smallpox).
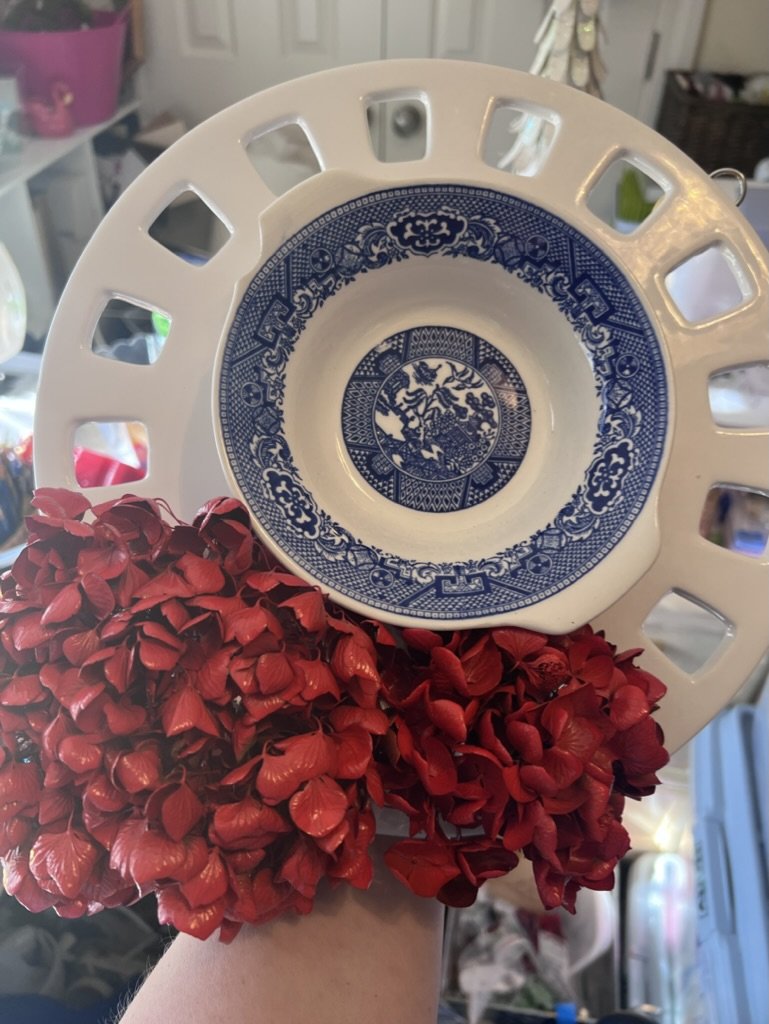
I decided to use the plate/ Blue Willow Frankenwreath I had created and heated up my glue gun. I laid the blooms out roughly how I wanted them, and while the holes for the stems were nice you could very easily trim the stems down and just use globs of hot glue on the base of the flower and it would work the same. I went with medium globs of glue on the front of the plate to hold the base of the flower but since I had the option I also kept the stems long and glued them to the back.
I created a large glue blob for each stem and let it cool a tad before first holding and then taping the stem in the blob. Once it had dried all the way I pulled off the tape and put another huge blob on top of it, thus encasing each stem in its own tiny sarcofagus (turns out it’s sarcoughagus but I’m not gonna lie…I like the f better).
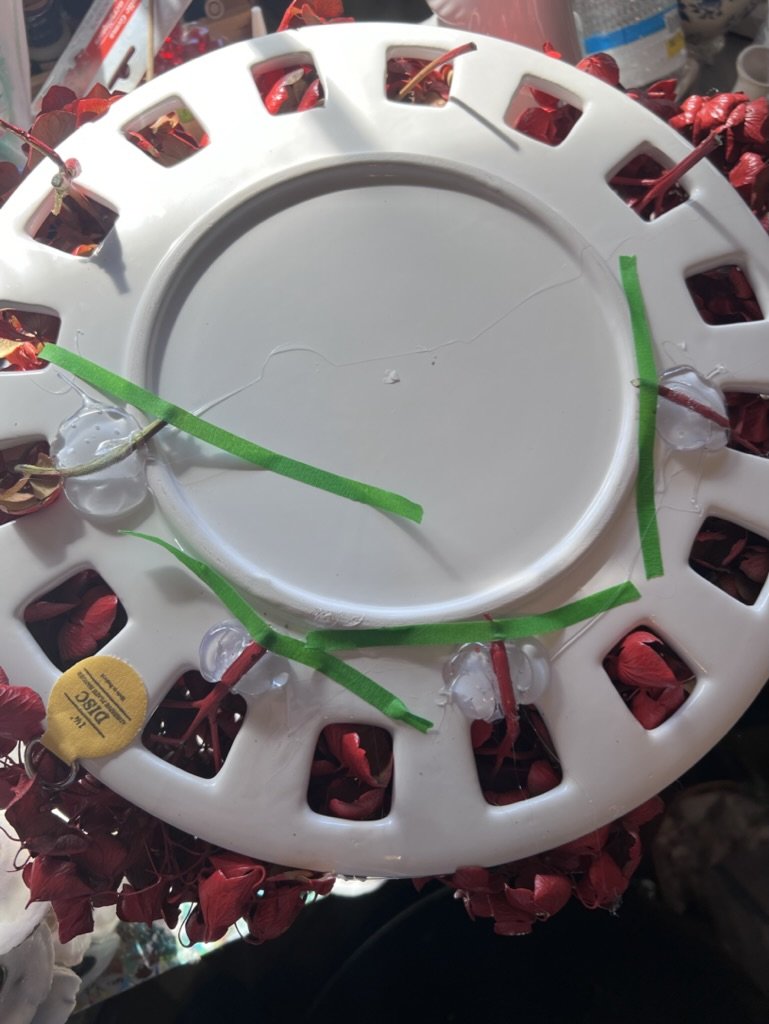
I forgot to mention I put an adhesive plate hanger on the big plate before I started. You could add this at pretty much any time or use a ribbon hanger or titebond on a picture hanger. These had good reviews and the wreath hasn’t fallen yet so they seem to be working. (https://www.amazon.com/gp/product/B00T14OPH0/ref=ppx_yo_dt_b_search_asin_title?ie=UTF8&psc=1) I guess I was too busy burning off my fingerprints with the glue gun to take a picture of the second blobs but I think you can imagine it. Once they were all on it became obvious they would need another spray of red so they didn’t look like weird green spotted smallpox victims.

I very lazily slipped a piece of paper over the bowl to “protect” it and gave the whole thing another once over. Not surprisingly to anyone but me some paint got on the bowl. Fortunately, I know myself and always keep low odor paint thinner on hand so a quick swipe on a paper towel and the Blue willow bowl edge was as good as new.
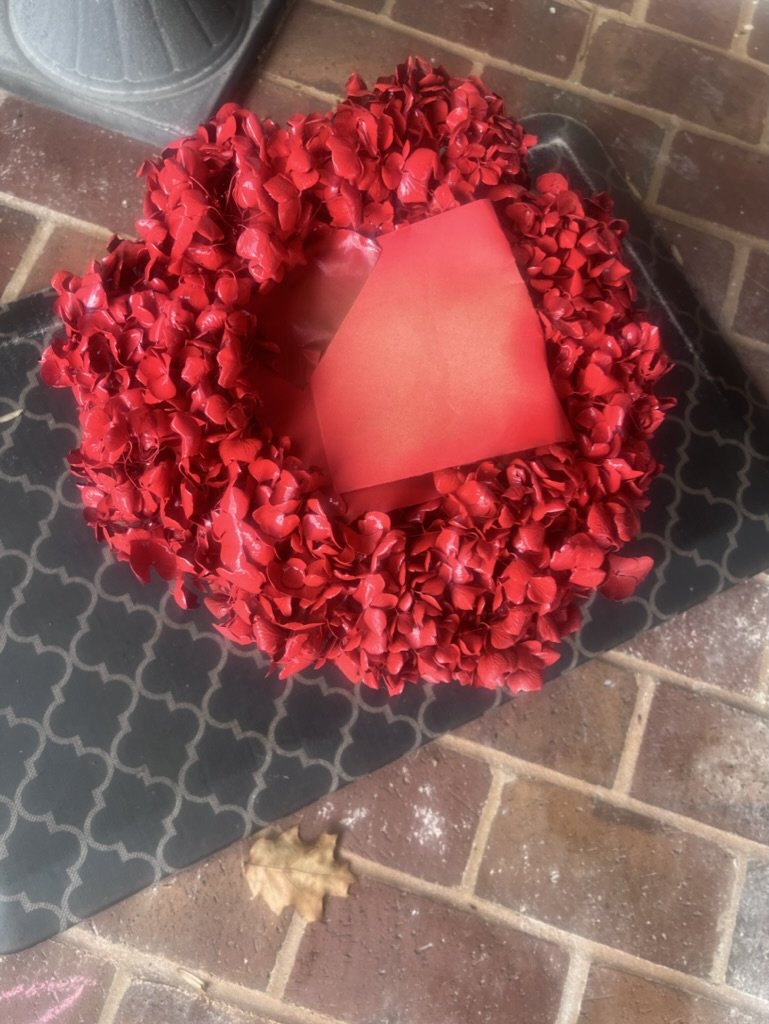
The beauty of the hydrangeas is that you can break off small bunches to get the look of the wreath you want, especially to make it look clean around the outside. Save those broken off bunches f or any half or weirdly dried flower heads and you can hot glue them in to fill in any holes.
My patented “hot glue the snot out of it because these bulk hot glue sticks from Amazon are not gonna melt themselves” technique would work well with any types of plates or pottery, and on a grapevine or metal wreath. If you wanted to use the hydrangeas on a wreath with greenery or even to decorate gold deer, the tops of large ornaments, etc you’d do better to wrap wire around the stem and then wire the hydrangea where you want it. Also, an important life reminder that you don’t want to hot glue onto a styrofoam wreath unless you enjoy hot glue mixed with styrofoam burns.
If I was going to hang it outside I definitely would have sealed it with clear spray, and I may still at some point, but for now it’s just hanging from ribbon from the top finial of my secretary. I love the pop of the poppy with the blue and white and that it’s very different from any other wreath I’ve made!
